This post is also available in:
![]() Nederlands (Dutch)
Nederlands (Dutch)
 Resizing photos for your blog is probably something that every blogger struggles with. I know I do! Everybody is so obsessed with megapixels when they buy a new camera. We want more, more, more! Resulting in beautiful photos…and huge file sizes. All those pixels are great when you want to make prints, but if you don’t want your blog to take forever to load, you’ll need to resize your photos.
So what’s so difficult about resizing a photo? Reducing the number of pixels can make a photo look blurry and not sharp and crisp like the original (larger) version. I don’t know about you, but I want the smaller version to look just as good.
I’ve read so many tutorials about this topic and finally found a workflow to resize my blog photos that works for me. There are probably a million other ways to do this, but this is how I do it for Urban Pixxels.
Step 1: What’s the best image width for your blog?
 Obviously every blog is different. I want my images to align with the text, so they need to be the same width as my blog. Have a look at your blog settings to check the number of pixels you need. For me it’s 900px, but for most other blogs it will be smaller, especially if you have a sidebar.
Then there’s the thing with retina displays. Gotta love those super sharp displays, but you’re also going to need twice as many pixels to get the same sharp effect.
That’s why I upload photos that are 2x the width of my blog, so they’ll look good on both retina and non-retina displays. The downside is that the file size will be larger, which slows down the blog a bit, so it’s up to you if you want to do this.
Step 2: Resize your photo in Photoshop
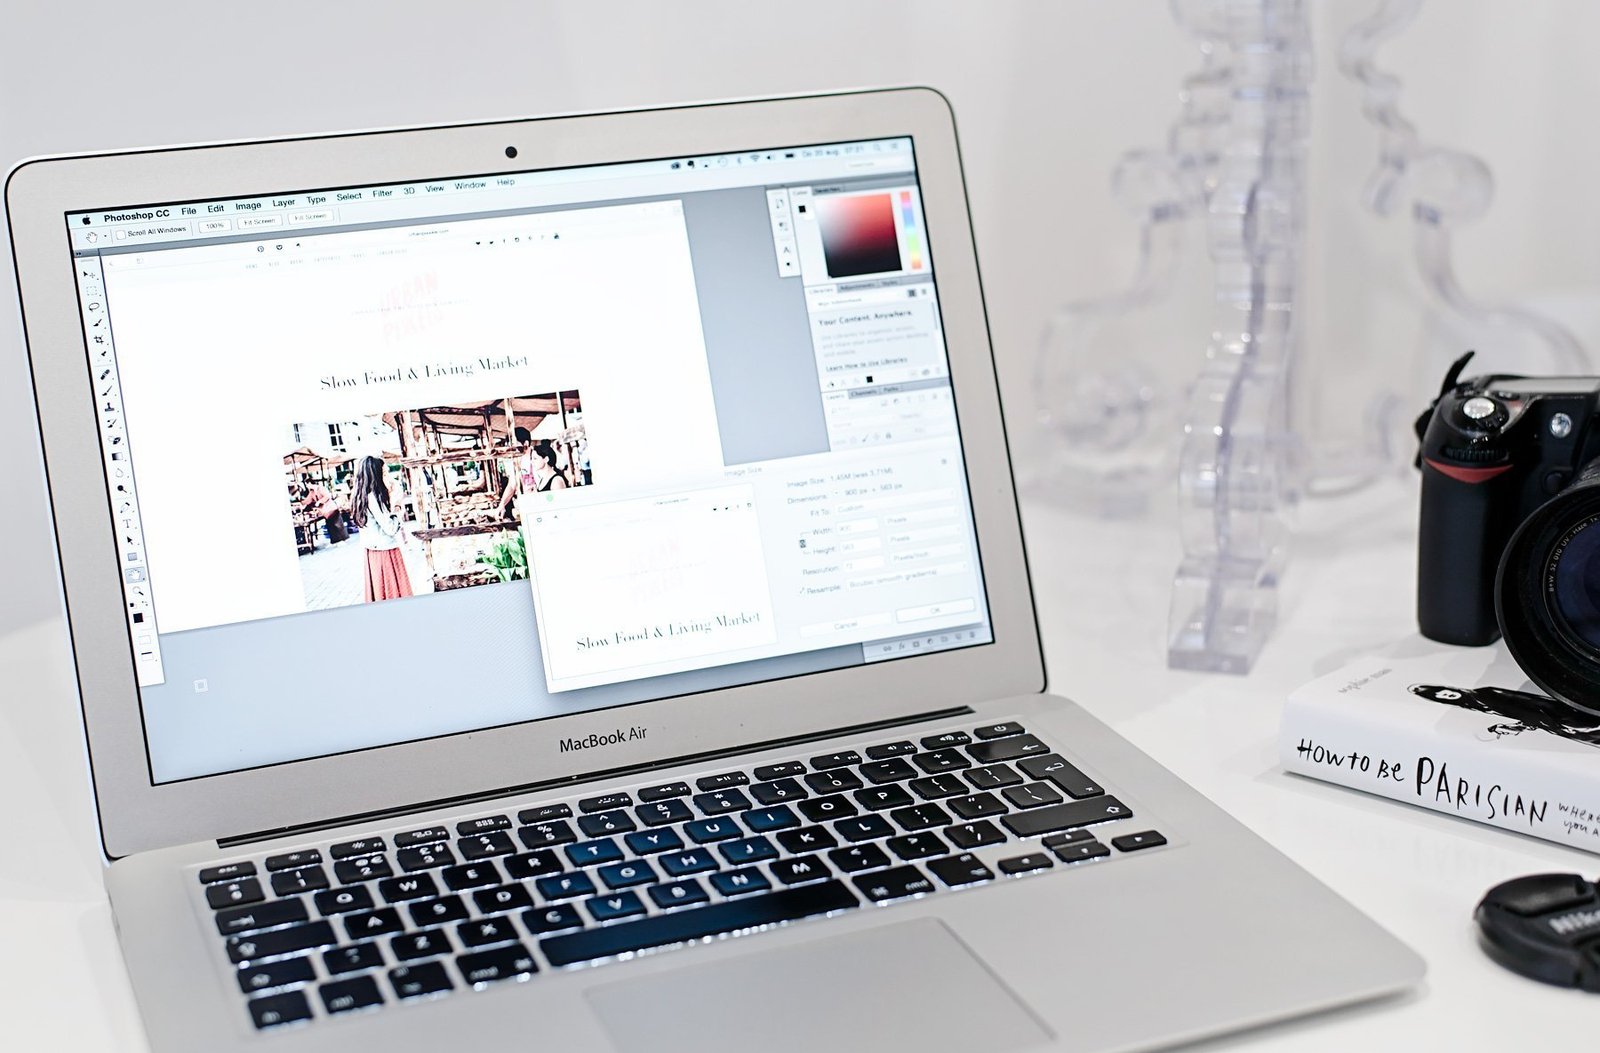
![]() I’m using Photoshop CC to change the size of my photos. Of course I can export a smaller version in Lightroom (or other programs) as well, but I’ll need Photoshop for the next steps.
I’m using Photoshop CC to change the size of my photos. Of course I can export a smaller version in Lightroom (or other programs) as well, but I’ll need Photoshop for the next steps.
Open the photo in Photoshop and select Image > Image Size.
Change the number of pixels next to ‘width’ and make sure you’ve checked the Resample box and that it says ‘Bicubic (smooth gradients)’. If you want you can also change the resolution as you won’t need more than 72 for web images. Click ‘OK’
Step 3: Make it super sharp
 If you would upload the photo after the previous step it would look okay, but compare it to the original photo and you’ll definitely see it’s less sharp. So we need to add sharpness. It’s important that you do this after you’ve resized the photo.
Copy this layer by clicking Ctrl + J (PC) / Cmnd + J (Mac) and then select Filter > Sharpen > Smart Sharpen.
Here you need to play around a bit with the Amount setting to see what will give you the best result. Because I use RadLab to edit my photos and already add a filter there for sharpening, I usually do 50%, but you can definitely go higher if you feel it needs more. And have the radius setting set to 0,4px.
Step 4: Save your photo for the web
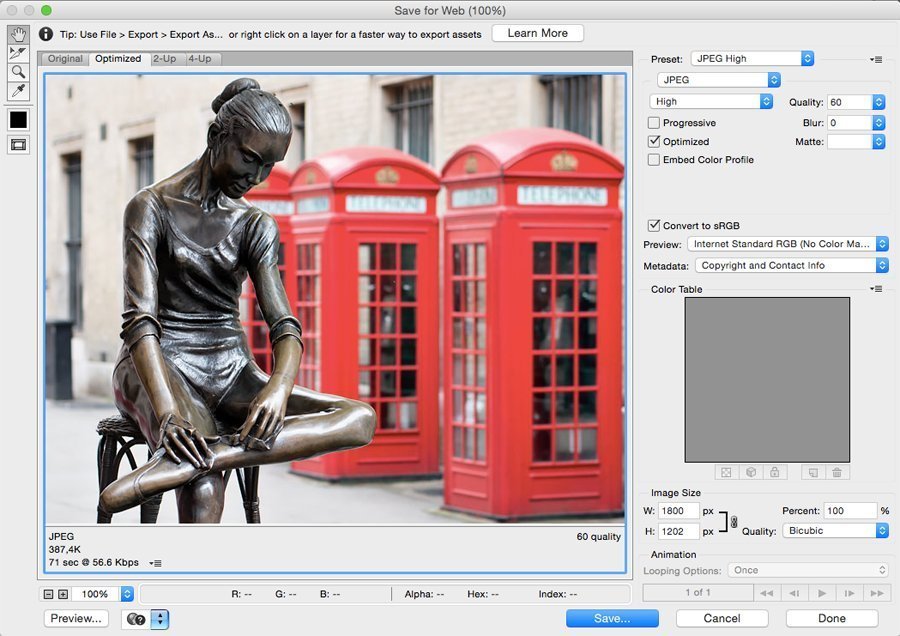 Instead of just saving your photo via ‘Save as’, I’m using the ‘Save for Web’ option. This will optimize the file size, while still maintaining a good image quality.
So choose File > Export > Save for Web (Legacy).
Depending on what file size you find acceptable on your blog, you can change the number under ‘Quality’. On the left, underneath the preview you can see you how large the file will be with these settings. I usually go for quality 60 (JPEG High), but depending on the file size I might go lower or higher. And make sure that Quality next to Image size (bottom right) is set to ‘Bicubic’.
And that’s it! A couple more steps than just exporting the photo with less pixels, but you’ll definitely notice the difference. If you have any secret tips for how to resize your photos while still keeping them super sharp, then please share them in the comments.